I need to give credit to this post in the pfSense forums which showed that this was possible. This box is pretty nice in that the processor is a Celeron 2.0GHz and it has 6 onboard Intel 10/100 NICs which are preferred by far over the usual Realtek NICs found in embedded devices. It was just by chance that I saw the post the other day even though it had been posted a while back. My company had two of these donated a while back but we weren’t using them because we had no real need to muck with the licensing when the hardware was discontinued. Have a look at what you can find these Symantec 5420 Security Gateway for these days. The author of the post gave a few tips but no real instructions so after I got it working I thought I would put together a step-by-step guide.
First, what you will need:
- A knowledge of how to install pfSense – This guide assumes you have installed pfSense before. If you have not, look at the detailed instructions on the pfSense wiki.
- 1 Symantec 5420 Security Gateway – these can be found secondhand since they are discontinued
- 1 IDE HDD (Hard Drive)
- 1 computer that can boot from CD – you will not need this after the install is finished
- 1 computer with a serial port and a serial cable – this can be the same computer that you boot with but must have an OS
- Burn a copy of the latest stable version of pfSense – I chose 1.2.3-RC3 which I have used and is quite stable.
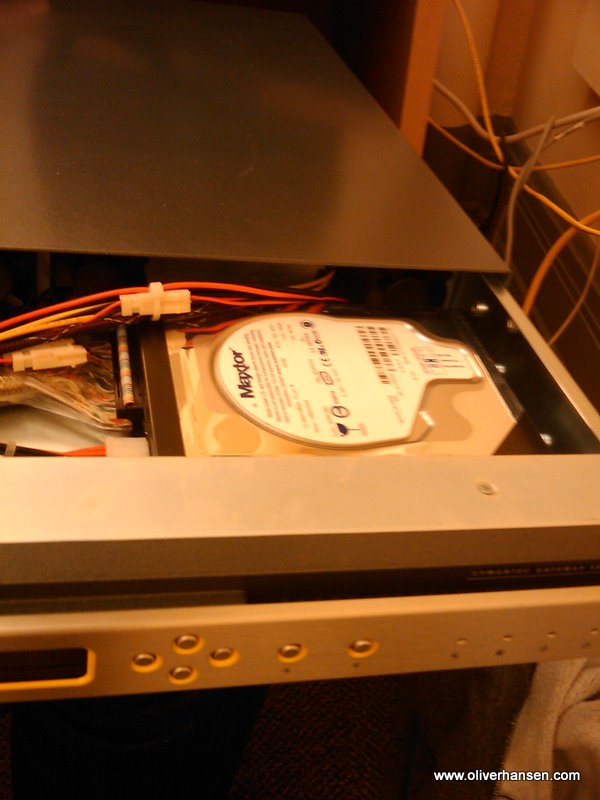
- Open the case of the Symantec 5420 and remove the HDD and the CF-to-IDE adapter. Put them both aside in case you want to revert to the Symantec system at some point.
- Take a HDD that can be erased and put it in your PC – remove all other HDDs from the computer so you don’t overwrite the wrong one and set this one to Master.
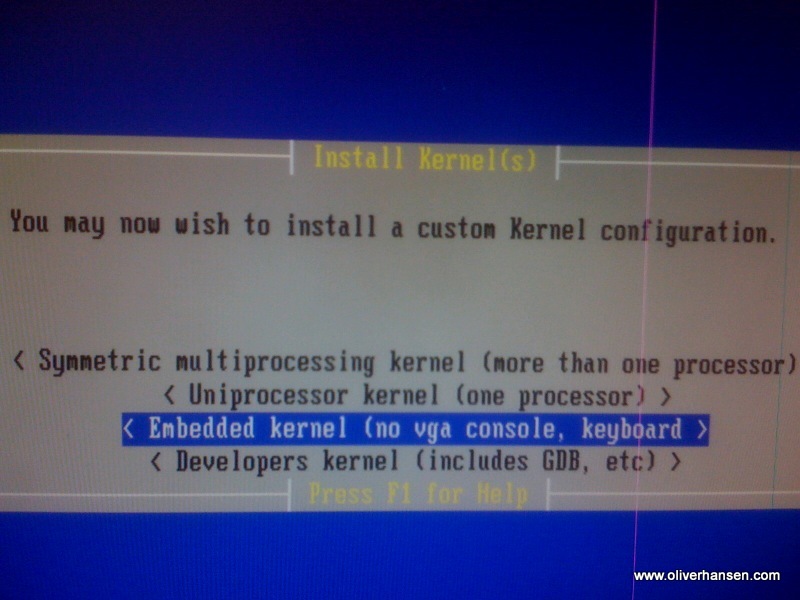
- Boot the pfSense CD and choose “Easy Install” which will give you the kernel option we need at the end.
- After the files are copied to the hard disk, choose “Embedded Kernel” from the custom kernel choices – this will give us output to the serial port since the Symantec 5420 does not have a monitor output or keyboard inputs.
- When the install finishes, choose reboot and wait for the computer to shut down. Before it boots again, turn the computer off and remove the HDD.
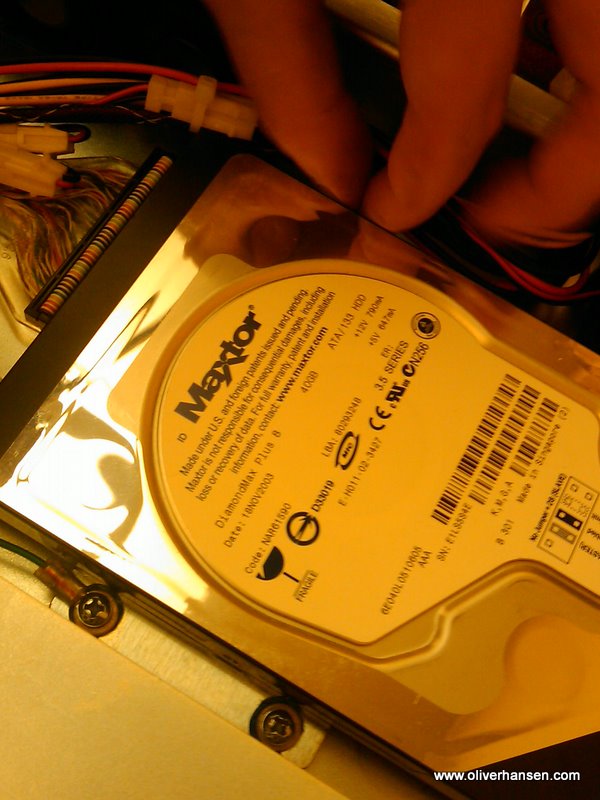
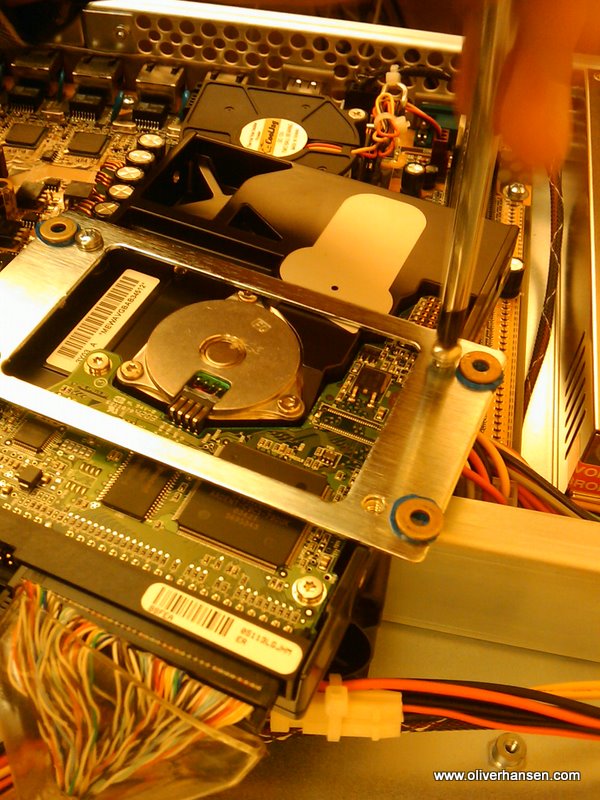
- Install the HDD into the Symantec 5420 and ensure the jumper is set to Master.
- Plug in your serial cable from your running PC and the Symantec 5420 serial port and begin a serial connection with PuTTY or another client program and connect using 9600 8-N-1 settings.
- Turn on the Symantec 5420 and see the boot screen come up on your terminal window after about 15 seconds. Important: Make sure to choose boot option 2: ACPI Disabled. If it does not boot, go back and check your steps. Ensure you chose the Embedded kernel during install.
- When the system boots, it should recognize all the hardware and then prompt you to set up the interfaces just like a normal pfSense installation.
- This step seems to only happen if the drive was not Master in the computer it was installed in. If it doesn’t boot the first time and you get a “mountroot>” prompt it is because the name of the drive was different in the machine you installed pfSense on. As the prompt will tell you, type “?” to see a list of the possible valid partitions. You want to replace the first part (drive name) with what you see in the currently installed and possible drive partitions. If you got the message “Trying to mount root from ufs:/dev/ad2s1a” but your valid drives all start with ad0, then type “ufs: ad0s1a“. Once the computer has booted you will need to take one more step to avoid this in future boots. You will need to edit the file /etc/fstab and change the drive reference (ad0 in the example) to be correct. You can edit this file through the web interface in pfSense or using vi or ee from the shell command prompt. Note: this tip was taken straight from the official pfSense book which I recommend buying if you are using pfSense frequently.
- Next, to make sure it boots with ACPI disabled by default you will need to make another edit. /boot/device.hints is the file. Add a line at the bottom that says hint.acpi.0.disabled=”1″. Now when the system is booted, boot with ACPI disabled will be default.
*Note that this has been reported to be unnecessary for others. I had no luck with ACPI enabled the first time I tried but that could have been related to something else.
Currently I do not know of a way to get the LCD screen functioning. There is an LCDproc package for pfSense but the driver is unknown. Hopefully this will change soon. Thanks as well to Gnuler (page in spanish – link to english) who seems to be the first record of someone trying out Linux on this box.
Were you ever able to get the LCD display working? Do you know the correct serial port settings for the LCD display (Baud rate, Parity, etc.)?
Thanks.
I did not but it is reported by others in the pfSense forum that they were successful in that regard. See http://forum.pfsense.org/index.php/topic,17843.0.html
What is the secret to getting the cover off of the device? I have removed every screw and it will not budge!
Thanks
It’s been so long… I think I remember a screw under a label or something. If you still can’t get it let me know and I’ll try to dig mine out.
[…] http://blog.oliverhansen.com/index.php/2009/11/18/install-pfsense-on-symantec-5420-security-gateway/ […]